Scheduling Campaigns not Affiliated to a Product
There are two ways to schedule campaigns not affiliated to a product, from the “New Campaign” page and the “Campaign Schedule” page. Let’s get you one step closer to getting MORE customers and MORE help!
To get started:
- Ensure you are logged in to your Pupsai account. For help logging in, refer to Login to Pupsai.
- Ensure you have subscribed to Pupsai. If you have not done so and need help subscribing, refer to Subscribing To Pupsai.
- Add platforms to advertise your campaigns. Refer to Adding A Platform for help.
Scheduling Campaigns from the New Campaign Page
From your dashboard:
- In the navigation bar to the left of the page, select the “Campaigns” menu option
- From the drop down menu, select “New Campaign”
- You’ll be redirected to the “New Campaign” page
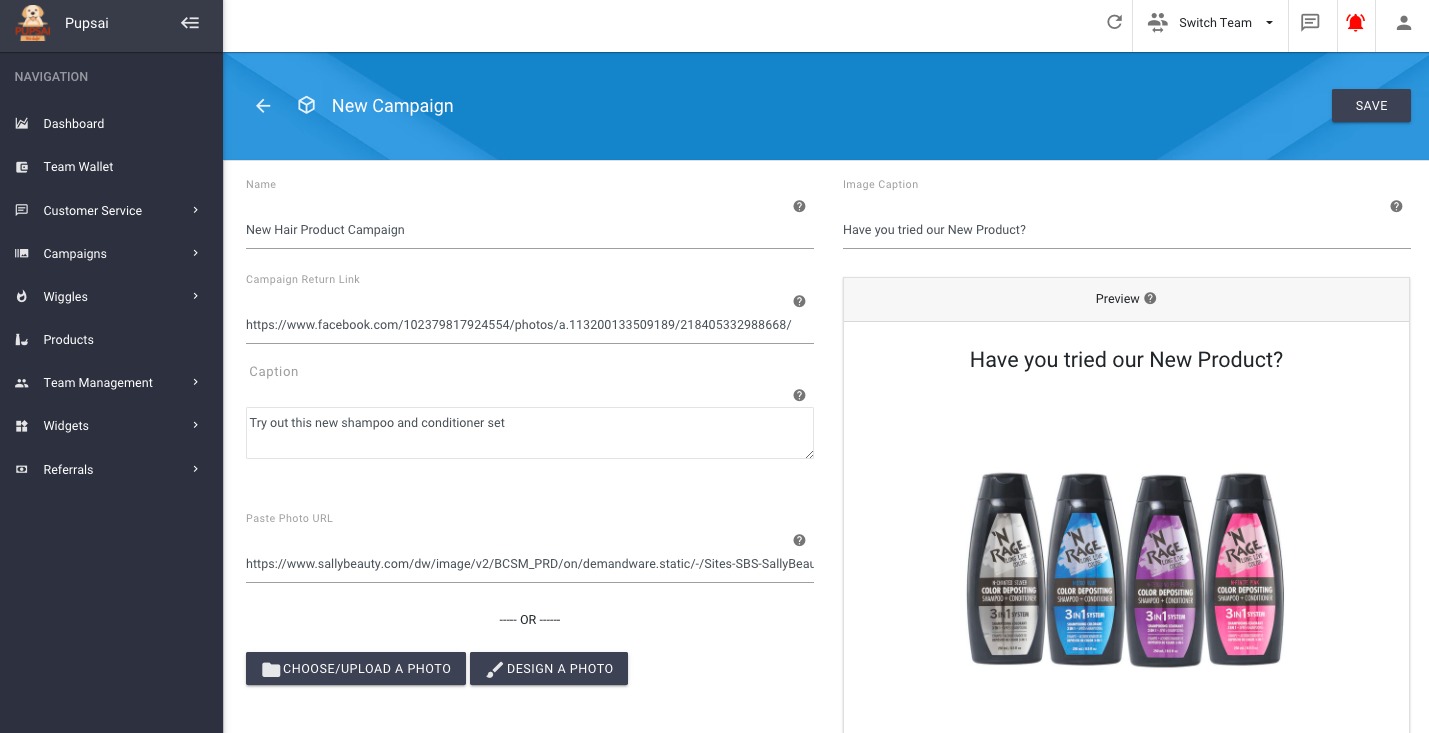
- Enter the details for the Campaign.
- To add an image to your campaign, you can:
- paste the URL to the image
- select one you previously uploaded to your media manager, or
- create your own design using the postermywall editor when you click the “DESIGN A PHOTO” button
- More information explaining each field is provided in the question mark icon. See image below
- To add an image to your campaign, you can:
- Once completed, click the “Save” button
- You’ll be redirected to the “Scheduling Campaign” page. Where you can, visit the campaign link, remove the campaign or schedule the campaign. See image below
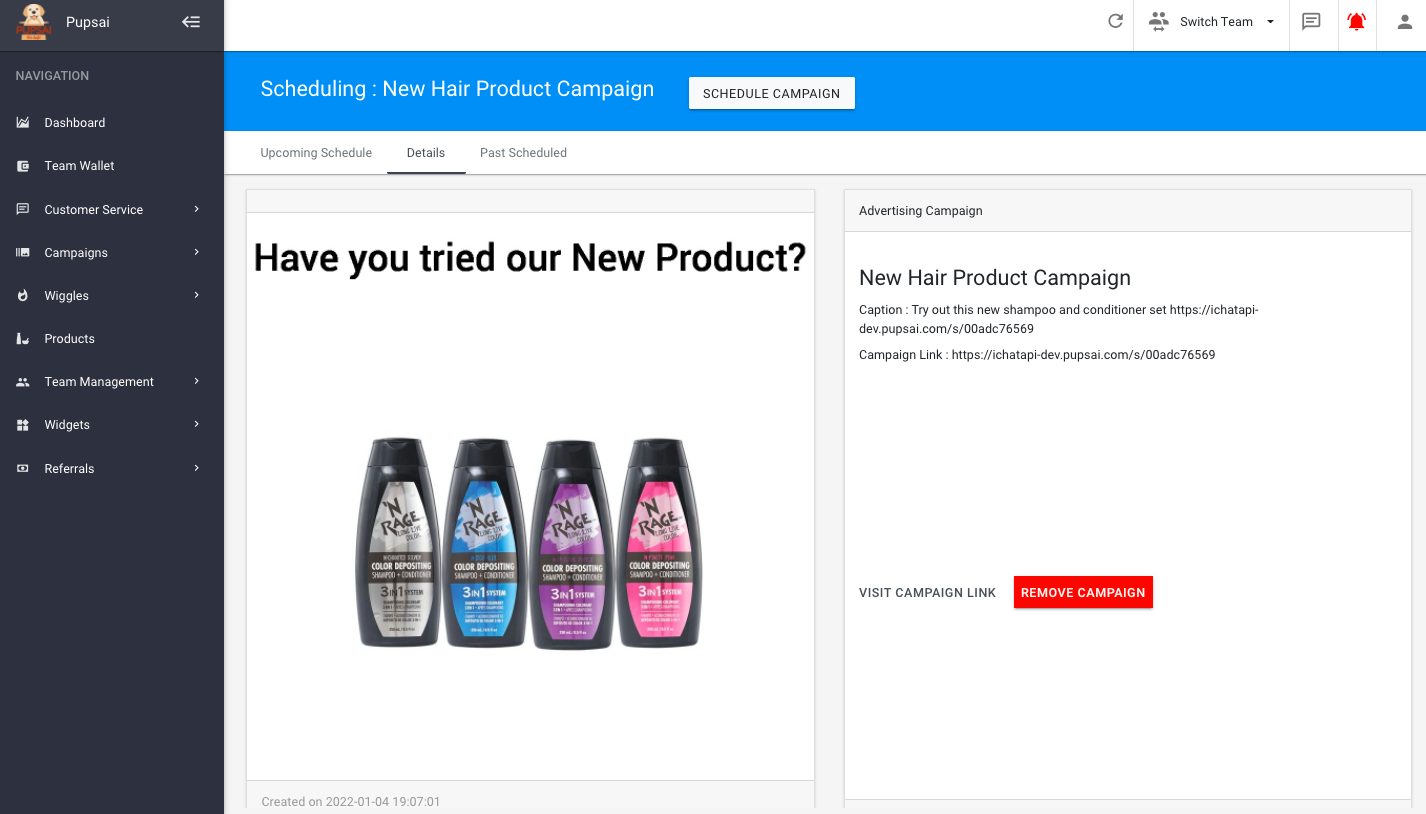
- Click the “Schedule Campaign” button
- A window will pop up to enter the desired time, dates and platform(s) you wish to share the campaign. When finish, click the “Schedule Campaign” button.
- A message will pop up to give confirm campaign creation.
- To view scheduled campaigns, click the “Upcoming Schedule” tab
Scheduling Campaigns from the Campaign Schedule Page
From your dashboard:
- In the navigation bar to the left of the page, select the “Campaigns” menu option
- From the drop down menu, select “Schedule”
- You’ll be redirected to the “Campaign Schedule” page seen below
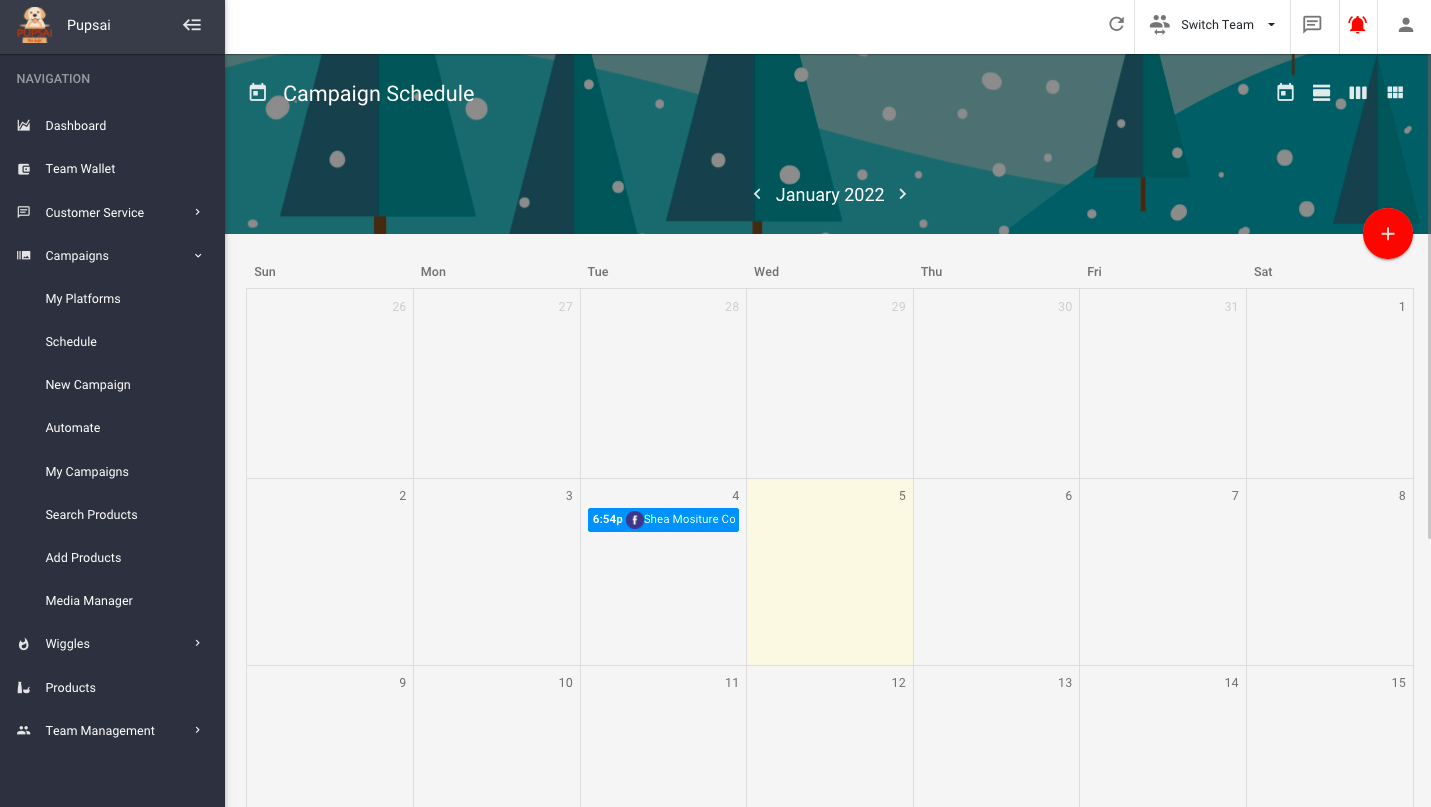
From this page you’ll be able to:
- View all scheduled campaigns on the calendar
- Schedule existing campaigns
- Create new campaigns
To Schedule Existing Campaigns:
- Click the red plus icon button at the top right of the page, or click on your desired calendar date
- A pop-up to enter the campaign details will appear as shown below
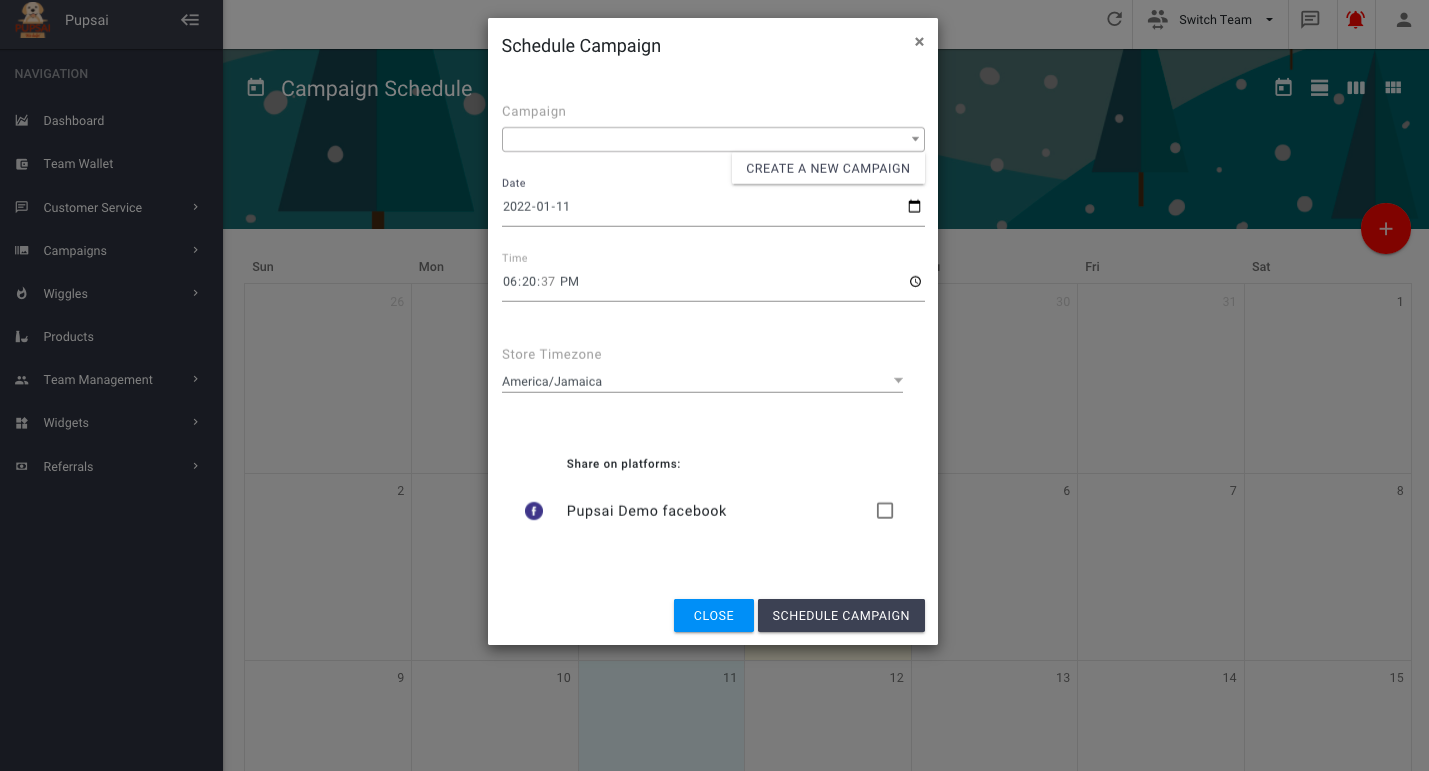
- From the “Campaign” drop down list, select your desired existing campaign to schedule
- Select the campaign date, time, timezone and the platform it should be shared on
- Click “Schedule Campaign”
- When you see the confirmation message, click close
To Create New Campaigns:
- Click the red plus icon button at the top right of the page, or click on your desired calendar date
- A pop-up to enter the campaign details will appear as shown above
- Click the “CREATE A NEW CAMPAIGN” button
- You’ll be redirected to the “New Campaign” page
- Enter the details for the Campaign. To add an image to your campaign, you can:
- paste the URL to the image
- select one you previously uploaded to your media manager, or
- create your own design using the postermywall editor when you click the “DESIGN A PHOTO” button
- More information explaining each field is provided in the question mark icon. See image below