Email Form Responses From Pupsai to Multiple People via Gmail
To get started, you must have:
- A Pupsai account. If not, please refer to Register for Pupsai.
- You’ll also need to be subscribed to Pupsai. Please refer to Subscribing to Pupsai.
- A Zapier account. If not, please refer to Sign-up for Zapier.
- A Gmail account. If not, please refer to Create a Gmail account.
Creating a Form Response in Pupsai
- Please refer to How to create a Form Response.
Connecting Pupsai to Pull the Data
- In a new tab, login into your Zapier account. Click here for reference.
- From the left navigation menu, select the “Zaps” menu item.

- Click the “Create Zap” button. You will be redirected to a page resembling the one below:

- In the top left of the window, click in the “Name your zap” section and type a meaningful name for zap.
- In the “When this happens …” section, start typing “Pupsai” in the “Choose App & Event” search bar.
- Select the Pupsai icon when it appears on the screen.
- From the “Choose Trigger Event” drop down list, select “New Form Response”.
- Click the “Continue” button.

- From the “Pupsai (1.0.0) account” drop down list, select your Pupsai account.
- If you are not seeing your account that means you are not signed into your Pupsai account. To do so, select “+ Add a New Account” from the bottom of the drop down list.
- You will be redirected to sign into your Pupsai account. Click here for help logging in.
- Once logged in, you’ll be redirected to your Pupsai dasboard. Close the tab and head back to the create a new zap page.
- For a second time, select “+ Add a New Account” from the bottom of the drop down list.
- You will be redirected to Pupsai.com, where Zapier will request permission to access your account.
- Click the “Authorize” button to continue. You’ll be redirect back to the create a new zap page.
- Click the “Continue” button.
- From the “Request Process Form” drop down list, select the desired form response.
- If you are not seeing the desired response, select the “LOAD MORE” button.
- Click the “Continue” button.
- You’ll be redirected to the “Find Data” section to test that your form response was created successfully pulled from your Pupsai account.

- Click the “Test trigger” button.
- If the form response was successfully pulled from your Pupsai account, you should see a “We found a form response!” message onscreen.
- At the bottom of the screen, you’ll see a box with “Zap is ready – now turn it on!”
- Click the toggle button to turn the zap on.
- To exit, use the back arrow in the top left of the window.
Connecting Gmail to Send the emails
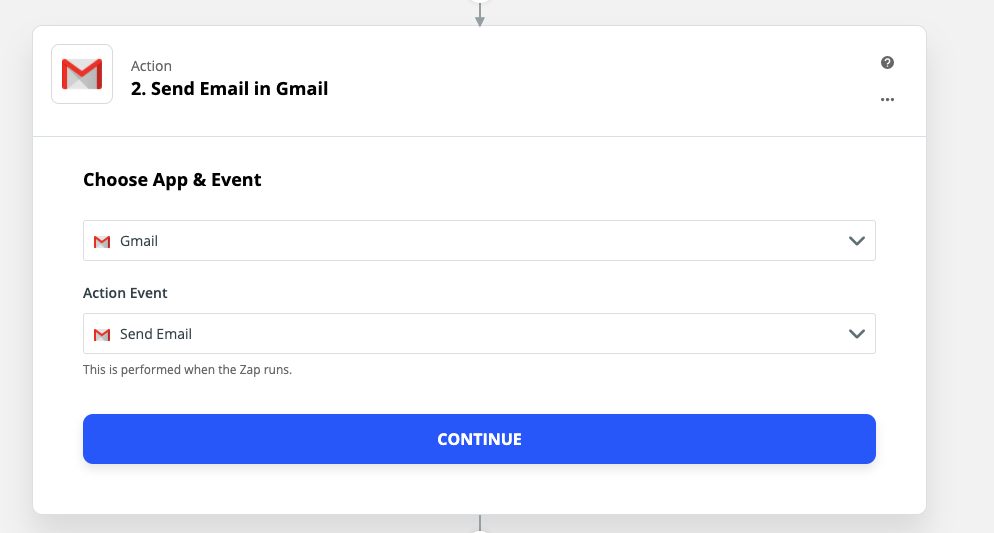
- In the “Action” section, start typing “Gmail”
- Select the Gmail icon when it appears on the screen.
- From the “Action Event” drop down list, select “Send Email”.
- Click the “Continue” button.
Click the “Sign in to Gmail” button. You will be redirected to sign into your Gmail account.
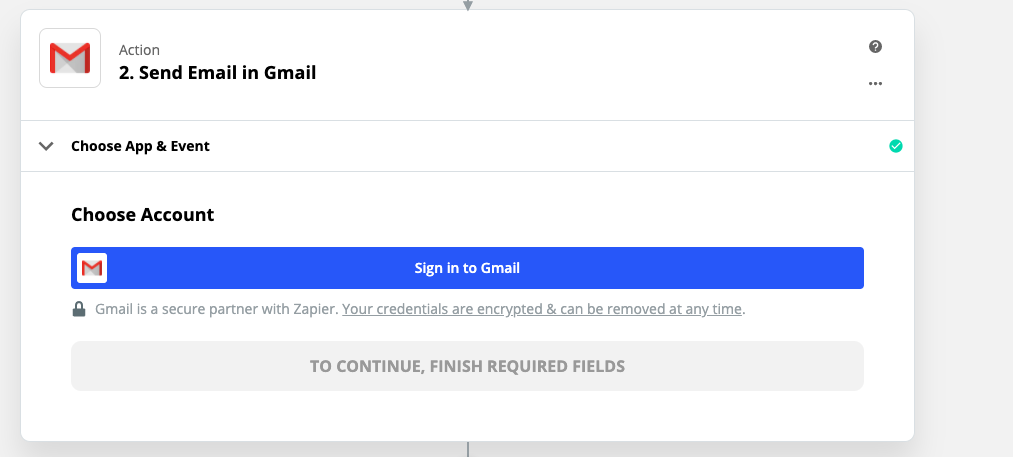
After successfully signing into your Gmail account:
- Choose your Gmail account from the “Choose Account” section.
- Click Continue.
- In the “Customize Card” section:
- Add a comma separated list of email addresses in the “To” field.
- From the “From” drop down list, select your gmail account.
- Customize the remaining fields as you like. See picture below for an example.
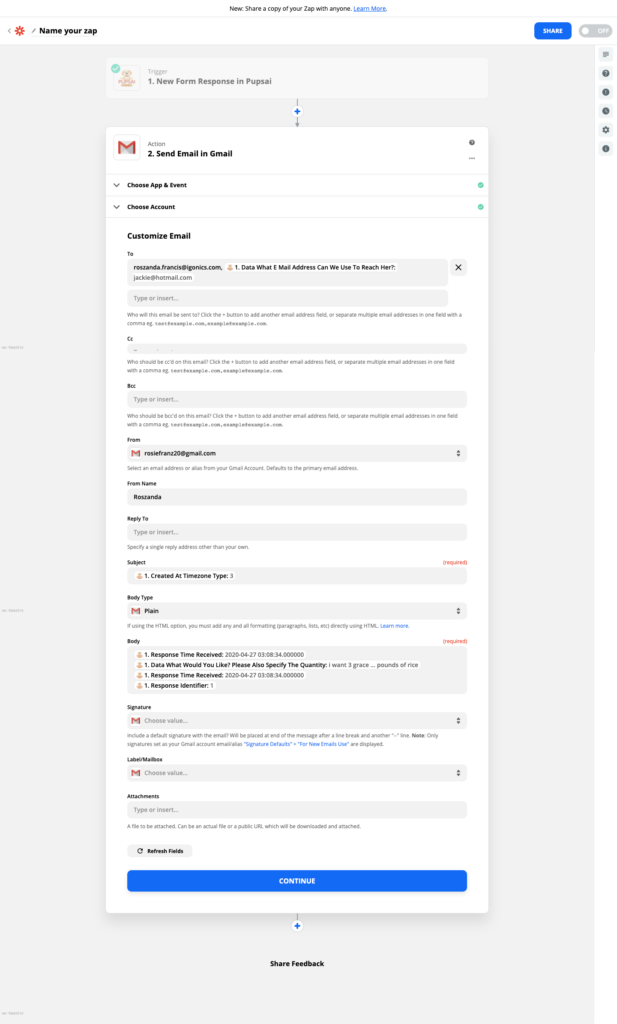
- Click the “Continue” button. You’ll be redirected to the “Send Data” section to test that your email(s) were sent successfully.
- Click the “Test & Continue” button.
- If successfully connected, you should see a “Test was successful!” message onscreen.
- At the bottom of the screen, you’ll see a box with “Zap is ready – now turn it on!”
- Click the toggle button to turn the zap on.
- To exit, use the back arrow in the top left of the window.
Verifying the Emails with the Form Response was Sent
- Check the inbox of the email(s) that were used in the “To” field above, to see if the email was received.
Automatically Sending Emails
Now that the zap is activated, once a form response was triggered in your Pupsai account, Zapier will automatically send an email with the details specified to the email(s) provided.